Monday, December 8, 2008

Technology a day keeps the doctor away - Jen Zawis

“How the tables have turned…” my software developer husband commented upon hearing of my newly crowned/necklaced “Geek at the Creek” status. Prior to the past two years, I could most often be heard hollering for my husband to come to my rescue as I was at the mercy of our computer, unsure of what to do next and overwhelmed by how to approach a technology situation. I have undergone a complete technology makeover, however, thanks to my fellow geeks at the Creek and have taken ownership of learning about technology for myself, and even more so, for my students. I push myself to try new technologies, using the “I think I can” mantra. I’m determined and optimistic, and I think that that is half of the battle.

I do try to use technology in my classroom on a daily basis. As more research comes forth about how the United States is “failing our geniuses” and that we are continuing to lose ground in math, science, and technology relative to the rest of the world, I feel that it is my duty to provide my gifted students with as many opportunities to learn about and be successful in as many new technology applications as possible. These children represent some of the brightest minds that are up and coming. If I don’t provide them with a multitude of technology opportunities, I feel that I am not doing them justice. They enjoy it and absorb it, and more often than not, we go above and beyond my expectations in building technology skills.

One of the main avenues that I use in my classroom on a regular basis is blogging. I have a blog for each of my classes and the students are the sole authors of these blogs. I have taught my students a number of tools to use when they wrote a blog post, including how to upload images and photos that correspond to their post, as well as how to create links within their posts to other websites.

I have taught my 4th and 5th graders how to use wikis as a way to collaborate on various projects. For example, one of the lessons in the scientific approach portion of both the 4th and 5th grade gifted curriculums is to learn about eminent scientists. In order to make this lesson more enticing, I taught the kids how to make an eminent scientist wiki, so that they could learn about multiple scientists, and if more than one student wanted to write about the same scientist, they could easily do so via the wiki. I taught several lessons on the Seven Wonders of the World, and had my 4th graders add their research findings about each of these wonders to the appropriate continent wiki on the CCE website. I tried to teach them about as many features available to them on the wikis as I could. The bells and whistles always interest the kids most of all.

The other ambition I am working on is having my 4th graders type (another practical skill) their own “Choose Your Own Adventure” stories and link their adventure choices and endings together.

I recently taught my 5th graders how to use Microsoft Photo Story, which I find to be very similar, but a bit more kid- friendly than Movie Maker. I had taught them a series of lessons on bridges, and wanted them to create some sort of final project. I decided to teach them how to use Photo Story and produce a slideshow demonstrating what they had learned about bridges. I wanted them to learn something that they could use for future projects, should they choose.

My goal is to try to teach my students as many practical technology applications as I can- whether it is via Voicethreads, Wordles, Movie Maker, learning how to complete effective internet searches, or simply reviewing how to save images and documents to their share drives. I try to bear in mind that they need to learn things that they can use in the future- whether that is when they work on projects in middle school, or simply to further deepen and broaden what they are working on at Chets Creek. As I tell my students “Practice makes better”- perfect is a word we try to avoid in the gifted room for sure. We aren’t going to be able to learn it all at once and be good at everything, but through trial and error, we’ll get there. My students deserve to learn these things, and I will do my best to get them thereJ

Wednesday, December 3, 2008

Creating a Flickr Streaming Slideshow - Lauren Skipper


I love taking pictures and I love being able to share them. I was introduced to the world of blogging a year ago by dayle and Maria So, The Skipper Blog was born! I loved the slideshow idea and I quickly became addicted to Slide.com and then Photostory and Moviemaker. I share this little side story with you because I want you to know that it has taken some time to become familiar with blogging and playing around with some of the "toys" that are available to bloggers. The idea for creating a streaming slideshow came from our #1 Geek(and I use that term lovingly) Melanie. I wanted to something different for my blog and so the she led me to flickr.


Creating a flickr blog widget is very easy once you know how to do it. The first step is actually uploading your pictures to flickr. You will need to sign up for an account, which is free. Why flickr? I found that flickr has the most options when it comes to using pictures for your blogs in creative ways. It is very easy to transfer the pictures to other applications such as Slide.com and even Movie Maker.


When you upload pictures to flickr it gives you options on tagging and creating "sets" when you save your pictures. This is important because you will choose which pictures actually feed into your photostream. I have three blogs, therefore I needed three seperate streams. When you click on the link above that allows you to createyour widget it will take you through an easy to follow step by step process.


There are so many fun flickr applications you can use with your students. Big Huge Labs has some creative things that you can easily do with your pictures from flickr. Applications such as jigsaw puzzles, magazine covers, mosaics, and motivational posters. The possibilities are endless!


Tuesday, November 18, 2008

Wikis Supporting Author Studies - Jenny Nash

I love author studies. Last year, we dove head first into our Allen Say author study while still in the early weeks of the school year and deeply involved in teaching rituals and routines. I was thrilled to see my students interests peeked so quickly in good, quality literature that challenged them to think deeper and stretch farther. I also noticed how an author study can quickly become an all-encompassing project -- involving not only reading and writing, but history, geography, and research skills. With an author such as Allen Say, whose works are widely historical and cultural in nature, I found it necessary to build my readers' schema and record our findings for future readings.

This year, I've found a way to make it even more effective and motivating for my students. A wiki.


With Melanie's help, we created a skeletal wiki. Pages were created for each book, as well as various other topics related to our study, such as vocabulary and historical references. The vision was that this wiki could serve as a publishing method for our responses and an opportunity for extending higher learners' thinking.

For example, during the course of our author study we studied the genres and elements of literature. Therefore, within each book's page students have recorded literary elements such as genre, characters, and setting. Another focus of our study was determining the theme of a text. So, this, too, is included on each book's page. We also, in part to prepare us for the DRA2, practiced writing short summaries of books - focusing on what is important, without telling "too much". You will find that student's short summaries for the Allen Say books are also included.

As I mentioned earlier, I find that, with this author study in particular, students need to develop a strong understanding of historical events and periods, specifically, World War II and Japanese-American Internment Camps. I conducted some searches and found a few websites with information I thought would be appropriate, meaningful, and useful for my students. I included links to these sites within the wiki, as well.

The author study includes a vocabulary component, too. On each book's page, students have identified "interesting language/new words". Additionally, a separate page was created to house a master list of vocabulary. Originally, the vision was to have students synthesize the meaning of these words by selecting an image from the internet to represent each word and insert within the page.

There are more creative opportunities, too! For instance, I created a readers' theater script for Under the Cherry Blossom Tree. My students rehearsed this in small groups and independently at home. I recorded their readings with my Flip Video and can add this to my wiki! Additionally, my students created a piece of original artwork, designed to represent their favorite book or piece of the study. These pictures were photographed and added to a VoiceThread. Students then recorded their "mini-response" to their reading to create a class response. This, too, will be included in the wiki, as well as our class blog.

This project, being the first of what I hope will be many, was not without obstacles. In retrospect, I think I bit off a bit more than I could chew! I had high hopes of creating a broad tool to serve a multitude of purposes. However, my students and I were just not ready for this degree of implementation. There was training to do and wrinkles to iron out. For one, hardware. With only the two student stations and one laptop available for my students during the school day, adding information was slow. I investigated the laptop lab, but was told there were issues with using it to upload content in mass. So, I invited students to join the wiki, get their own user name, and work from home. Unfortunately, they are at home with little, if any, technological support, so few students took advantage of this opportunity. I expect that with more experience in the classroom, and continued support for students and parents technological learning, my students' (and parents') confidence in technology will increase and so will their participation at home.

Ultimately, I remain convinced that this is the next step in my teaching. It has motivated my students, as well as opened avenues towards learning experiences that I only imagined were possible. My advice to those interested in trying it is -- JUST DO IT! Tackle it one step at a time.

Do not let your first be your last! My classes will soon embark on another author study together, for which we will create ANOTHER, entirely unique wiki. My purpose for this new wiki will be similar, but not identical, and the wiki will reflect that in its design.

In closing, begin with the end in mind. What is your purpose? What is your vision? What is the most essential piece? Begin there, remain focused, and you will be pleased.

Thursday, November 13, 2008

Readers' Theater with Flip - Lori Metzger and Karen Morris


After watching our colleagues demonstrate how easy a Flip camera is to operate we thought we'd give it a try. What better way to show your students work with fluency than a Readers' Theater? We found the perfect play to read on election day in our social studies book. The message was about working together as a community to take a stand against something you don't agree with. In this case, a movie theater was going to be built on the children's soccer field.

Students were put into heterogeneous groups and asked to read the play three times out loud. Each time they were told to practice using inflection in their voices and pay close attention to the punctuation marks. We chose this particular group of kids and taped their first and third reading. Wow! What an improvement! Not only did their expression and pace improve but they read over a minute faster!

When we reviewed the video with the class their success was obvious to us all. It really demonstrated the power of re-reading!

Tuesday, November 4, 2008

Four Corners Weekly News Show-Meli Launey

I have learned more about technology since I started my journey at Chets Creek than I have in my entire life. I am by no means a seasoned “geek” (only a wannabe:) but I will attempt to show you how easy implementing a classroom news show in your classroom really is. This post will not focus on movie making, because I feel that is something we have already learned about through our past geeks. It will, however, show you how our News Show is managed each week.


Mrs.Lopez and I start each week out by selecting 3 students from each of our ELA classes that will act as reporters for the week. The students are selected by interest and behavior. Each student is invited to be on the crew with an official Four Corners Reporter Assignment Sheet. This sheet includes the subject the student will be reporting on and and a spot for daily notes to take throughout the week on their subject assignment. The assignment sheet also includes a spot to get parent signatures for permission to be in the show and to stay after Friday afternoon to tape. Our 6 subjects are Reading, Writing, Word Study, Social Studies, Science, and Math. You will find our weekly reporters actively taking notes throughout the week on classroom lessons.


On Thursday night the students sit down to write their report. They may look through their notes and choose one lesson from the week they particularly liked to focus on in their subject report. Or they have the option of writing a subject report about the week as a whole. The job of reporter is highly coveted, and the kids really get into working on their reports. Some of them even watch the local news station to get ideas.


Fridays are the big day. After school we all meet and prepare to film. Mrs.Lopez begins listening to each child practice their report while I work with the anchors to tape (using a flip video) the opening and closing pieces. We choose 2 kids that did an exceptional job from the week before to be our anchors. The closing is the only "teacher written" part of the show. It includes upcoming school news and reminders. As soon as Mrs.Lopez finishes coaching a reporter, they go and find a spot to report from. For example, the math reporter may want to report in front of the bulletin board with multiplication clusters on it. After choosing a location, they come to me and we begin filming. The taping goes by quickly and we usually finish within 45 minutes. We have also collected some great "out-takes". After one boy accidently dropped a microphone, he suggested we create a "bloopers show" for the end of the year. Keep your eyes open for that show coming up in May!


After taping is done, the rest is a breeze. First, I load the videos into my computer. I use imovie (on Mac computers) to create the show, but Windows Movie Maker will work just as well. I have found pictures on google images to use as the backgrounds you will see transitioning to the different reports. Since I already have the format down, I simply have to open up the show from the week before and "cut and paste" the new scenes into the old show. Then I save it under a new name. It only takes about 30 minutes to create. All the music I have comes from itunes. You can search "sound effects" and get some really cool intros and background music. After you save the show you will need to upload it to Teacher Tube so that you can get the embed code for your blog. Your students and parents can view the Weekly Wrap-Up each weekend.


This project will help your students with their fluency, speaking abilities, and writing skills as well as give them a sense of pride in themselves. It has been a great way to incorporate technology into instruction and give others from all around the world a glimpse into our classroom. I hope you enjoy a sample of our News Show below.


Sunday, November 2, 2008

Collaboration Podcasting- Jessie Lipsky

In my opinion, the whole point in having a classroom blog is to share your work and ideas with the world and have the world give you feedback and new ideas in return.  One way I am using my blog this school year is through a collaborative project Melanie Holtsman was already participating in called: Students Teaching Students.  Kim Cofino, a teacher at an international school in Bangkok, Thailand, started this project to help teachers and students share and reflect on work we are doing in Lucy Caulkin's model of readers' and writers' workshop.  Students Teaching Students provided me with access to Chrissy Heller's blog in New Zealand and Aly McAloon's blog in Thailand (of course, the internet provides me access to every blog... but I like these.)  While reading Aly McAloon's blog, I saw that she had recorded podcasts of her fifth grade students reading their narrative writing.  I was struggling to find ways to motivate my fifth grade students to make their writing more descriptive so I decided to play some of the podcasts from Room 229 as inspiration.


 My students loved hearing the work of children who lived on the other side of the world! Soon, we recorded (and are still recording) our own podcasts so the students in Thailand could hear our stories as well.  

This collaboration has given my students a new and specific audience for their writing.  I have noticed dramatic improvements in their writing now that they know their peers in Thailand and New Zealand will be reading and listening to their work in class.  

Podcasting
Podcasting stands for Portable On  Demand Broadcasting.  You can listen to podcasts on your computer or an Mp3 player like an Ipod.  Podcasts are free and download to your computer via a subscription.  My hope with this "geek" post is to help other teachers record and upload podcasts to their blogs. On a PC, I use the program Audacity to record my students' voices and gcast.com to upload their podcasts to the internet and eventually my blog.  On a Mac, I use the garageband program to record my students reading their work. 

The best information I can give you on podcasting is from a blog called Box of Tricks.  Click here to watch "Podcasting in 5 Easy Steps."  In this brief tutorial teachers can learn how to record audio files, transfer files into Mp3 files, upload them to a podcasting website, and finally publish them on their blogs.

Once you get the hang of podcasting it is a fun way to share student work with listeners all over the world!


Monday, October 27, 2008

Flip Video-Maria Mallon & Cheryl Dillard


Dear Fellow Geeks,

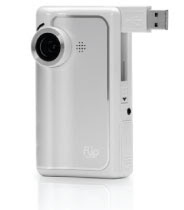
The Flip Video is easy, convienent, and fast. It allows you to video from 30-60 minutes depending on the memory size. It runs on 2 AA batteries and fits in the palm of your hand. The best part of the the Flip Video Camera is the ease of use. To record, you press the red button, to review what was recorded you press play and if you want to delete the video you simply press the delete button. Like we said, "It is so easy even a caveman can do it." We have used it to video songs, skills block activities, writing conferences, and Readers' Theater. After recording the video, you can download it to the computer using the attached USB port or use the AV cords to view your video on the TV. If you choose to add a video to your blog or the Ning, you will need to upload the video to TeacherTube or Google Video. Other features include the ability to make a custom video with music or capture photos from your videos. We suggest you try the Flip Video Camera for yourself by checking one out from the Media Center.

Monday, October 20, 2008

So Many Websites, So Little Time - KK Cherney

Hello fellow Geeks!
That sounds so funny to say out loud. I never really thought about the fact that I am a tech geek until we started this cool tradition at Chets, but I guess I am one in every since of the word. Looking back at how it happened was a totally natural thing. Picture this...me, 3 to 4 years old squatting down beside my dad as he was using the screwdriver or taking something a part. I think I sat for hours. That training evolved into a hunger to learn about how things work or don't work and finding solutions to make it work. Little did I know that my daddy was training me as a Santa's assistant. You wouldn't believe the stuff I have put together as he(Daddy Santa) slept in his bed dreaming of sugarplums dancing.


Now I think of how that laid the foundation of seeking out the latest and greatest tech tools and inspired me to seek out sites to make life easy. Speaking of websites, I probably find an average of 10-15 new cool sites a week. Sometimes I share so many in one sitting, everyone walks away on overload. I just can't help it. Today, however I will only share a few, just to get the creative juices flowing.
Finding the perfect website for students becomes a real challenge when there is so much out there to choose from. I have been a web site sleuth for a while now and I think I can share sites that are educational, challenging and at the same time exciting. A good starting point is to read the ALA suggestions of how to determine great sites for kids. The ALA has criteria that really will help you find the perfect site for your students. There are more in depth points listed that you may want to quickly review , I just wanted to hit the highlights. ALA Great Website for Kids Criteria

A. Authorship/Sponsorship: Who Put up the Site?
The name of the individual or group creating the site should be clearly stated.

B. Purpose: Every Site Has a Reason for Being There.
A site’s purpose should be clear and its content should reflect its purpose, be it to entertain, persuade, educate, or sell.

C. Design and Stability: A Great Site Has Personality and Strength of Character.
The information on the site should be easy to find and easy to use.

D. Content: A Great Site Shares Meaningful and Useful Content that Educates, Informs, or Entertains.

The title of a site should be appropriate to its purpose.
A way I determine if the students are hooked on a site is by allowing them to have 10 minutes of free time after the media mini-lesson and the checking out of books . If the site is re-visited I know that I have accomplished the mission of finding a site that they love to explore and they don't even realize they are building a great foundation of knowledge. Many times the site isn't just a game site, it just has the look. You know the look. Lots of graphics, not a lot of text, colorful, easy accessibility, great labeling for interactive play and just throw in terrific sound effects and you have a winner.

For instance, my students love this one. It is produced by the Library of Congress and it has 5 divisions that the student can visit and learn about amazing Americans, jump back in time and have a overview of history, explore the states, join America at Play and finally see, hear and sing from our American past. I can't keep them off of the Animation site. Totally interactive for that curious hungry mind.

The one thing that I can't afford when site surfing with my kids is to have a lot of advertisements on the perimeter of the homepage of the site. I try to stay away from those sites. They are such a nuisance and in some cases they lure my kids to locations that I would rather have them avoid. If I do share one of those type of sites I use the ads as a catalyst for the teachable moment and instruct them about cookies and other problems those icons may cause. It's just better to avoid those.

A great site that really shares stuff kids want to know about is the KIDSKNOWIT site. It meets all the criteria of a wonderful site for students, making education fun and its totally free. I could spend all day sharing the sites that I have surfed into and shared with CCE students.

Another example of coolness is the KBears site. It is extraordinary as it takes on the personality of a space ship called K Ship One and sails into the world of knowledge. Once you open the home page check out the Geo World link. It is great as it ramps even the older students. You will love it.
Finally, a site for you to check out for yourself .

INfiniteThinking
What is the Infinite Thinking Machine?
The Infinite Thinking Machine (ITM) is designed to help teachers and students thrive in the 21st century. Through an active blog, an Internet TV show, and other media resources, the ITM shares a "bazillion practical ideas" for turning the infinite universe of information into knowledge. They showcase examples of innovative instructional methods, talk with leading experts, and share real stories from the classroom to improve how we think, learn, teach, and live.
The shows and website are an important way to spark dialogue and help educators explore a wide range of innovative ideas. They rely on the collective wisdom of many experienced educators to select interesting ideas to share, but they cannot validate these practices beyond that. Also, please keep in mind that any mention of products, ideas, websites, and organizations does not represent an endorsement by the producers or sponsors.

Don't hesitate to check back periodically on our site for all of the cool websites that I find to make your job the coolest ever.
Now, where is that screwdriver?

Written by: KK Cherney

Tuesday, October 7, 2008

Windows Movie Maker - Rachel Bridges

Dear Fellow Geeks,

I would like to introduce you to a program that you may or may not already be familiar with. You may have thought, what is that for? Or you may have already used Windows Movie Maker to showcase the work that you do in your classroom.

Windows Movie Maker, a new look at a program that we can all use to jazz up the pictures of our Learning Adventures. Windows Movie Maker is available to Windows users (the program I used was included with Windows Vista). This program will allow you to piece together pictures, audio, and video to share with your audience. Piecing together is truly the best way to put it. You simply import pictures, video, and/or audio from your computer, flash drive, etc., and edit it on a storyboard. Save it as a movie file there you have it, your very own movie! I used Window Movie Maker to allow my parents to take a look into our daily learning as they attended our Kindergarten Open House. You will see pictures from each of our four main workshops, Skills Block, Reader's Workshop, Writer's Workshop, and Math Workshop. Below is a link to this movie. It was uploaded to Teacher Tube in order to share it.


Below is a flowgram that highlights a Windows XP website that will walk you through creating a movie with Windows Movie Maker. Be sure to watch the movies of how others have used this program!

Sunday, October 5, 2008

Student Blogs - Cheryl Chascin & Cynthia Rice

Why do I have all of my students blogging this year? I think this answers it all:

After reading Jeff Utecht’s (Have you noticed that the word “tech” is in the middle of his name?) post on his Skype with us on the first day of pre-planning, I posted the following comment: “I feel as if I am standing on the threshhold of something BIG. The possibilities and potential of what we can do this year are endless. Can you imagine a student approaching academic subjects with the same engagement and excitement they have for video games and texting? Can you imagine students with special needs using such a familiar technology to learn? In this age of leaving no child behind, how can we turn our backs on such a resource as this?”

Jeff replied:

“When you talk about students with special needs I thought I would share this
with you. I'm dyslexic and I know just how powerful this platform can be for
someone who struggles with reading and writing. I'm not saying it works for
everyone and you don't have to have special learning needs to use technology but
I've seen it transform some amazing kids. I talked about this on my blog way
back when
it might be of interest to you on a couple different levels.
1. We all start with one person reading our blog
2. The power of a real live audience and the freedom to write about what you love and what you want is a sure way into every students heart.
3. I still can't believe people care about what I write...not only care but care enough to put my blog in the top 10 of educational blogs out there (by some crazy person's standards)

My spelling is horrible, my writing and mechanics are horrible. It took me two
hours to write that post about Chets Creek and I know there are still errors all over it. But you know....I don't care. Before my blog I didn't write. When I started I was writing (according to Word) at a 4th grade level and reading at about a 6th grade level. Some 700 blog posts later I consistently write at a 9th grade level
and have read more books in the past three years then I have the rest of my
life. But the really interesting thing to me is, not once has someone commented
on my bad spelling, my grammer errors, or my run on sentences. Not only that, I
now write for two magazines, just finished a chapter for an Education and Web
2.0 book, and am being asking to write more and more. I just keep telling myself
"If they only knew......."Anyway...thought I would share. I've seen students
blossom when we allow them to write their way, write for their niche, and just
learn to love writing. We can only truly learn when we learn to love what we
do.” Nothing we could write says it better.

Check out my students' blogs in the sidebar of my blog. They'd love to hear from
you!
Written by: Cheryl Chascin (and Jeff Utecht)

Saturday, September 20, 2008

Scholastic Online - Shea Beaudreau

Can you guess what less paperwork, larger parent orders, and extra bonus points all have in common? Scholastic Book Clubs online ordering, of course! Are you already ordering books from Scholastic and ready to free up time and energy by having no money to handle and less paperwork to manage? Yes, yes, yes!!! No worries! Online registration is a quick and easy one-time set up.

Just watch this Flowgram on how to set up an account, and learn the quick and easy process in no time at all!


By: Shea Beaudreau

Flowgram - Angela Phillips

Flowgram: Welcome to the “Talking Web”
By Angela Phillips

Flowgram is a new way for you to communicate as it will assist you in creating presentations, give you a forum to talk about photographs you want to share, or help you to make richer blog posts!

You can take a collection of photographs, links, or videos and add audio of your voice to guide your viewer as if you were right there sitting next to them. You can even highlight (by selecting text) to emphasize certain features of what you are sharing on your flowgram.

Flowgrams can range from just one page (such as a page showing a picture of something) to a series of pages with multiple pictures, links, and/or videos. You can even use this with powerpoint presentations you have created.

Your viewers can control the pages, scroll them, click on your links, view your videos and more.

It’s as easy as 1, 2, 3.
Add your content (if you are entering a website, just paste in the url).
Add Audio (just hit record) and Highlights (just select the text you want to highlight).
Send the link to someone or embed as a widget to post a flowgram into your blog.

The website guides you through everything you need to know and do in a step-by-step fashion. There are also instructional videos to assist you as well. It couldn’t be easier!

Check out the first flowgram I created for the purpose of gearing my 4th grade students to seven particular websites to use in researching a planet by visiting the blog I share with Rick Pinchot, Dorry Lopez, and Meli Launey.


Monday, September 1, 2008

Donors Choose - Melissa Ross


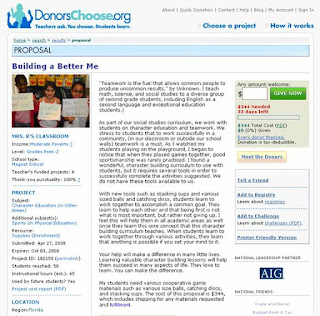
I have found a wonderful website that I cannot stop telling everyone about. It is called Donors Choose. I came across it one day while surfing the net looking for an attractive way to post a classroom wish list on my website.

Basics About Donors Choose
Basically, teachers ask for supplies for their classroom by choosing exactly what they want, writing a proposal for it, and submitting it to the website. Anyone that comes to the website can choose to fund any or all of your proposal. Once your proposal is fully funded, the DonorsChoose site will purchase and send you all of the materials - this means you don't have to deal with money, receipts, etc. The only thing you are required to do is have your students send thank you letters and pictures to the people who donated money to your proposal. They have even taken the stress out of this step. DonorsChoose will send you a “thank you package” that includes the names of your donors, a disposable camera, and a self addressed and stamped envelope. You and your students write thank you notes, you snap a few pictures with their camera, and you mail everything back to DonorsChoose. They develop the pictures. They mail the notes to your donor(s). You enjoy your new materials!

DonorsChoose runs on a point system to keep teachers like me from submitting 100 proposals. You earn 3 points for signing up (free). You spend roughly one point for every proposal you write. You gain one point every time a proposal is funded, one point for returning your thank you cards, and one point for the thank you cards being of "good quality."

How to Write a Proposal
To write a proposal, all you need is an idea and about 20 minutes. The process is simple and they walk you through it step by step. Once you have created an account, login. This will take you to your account screen.
1) To begin a new proposal, click “New Proposal.”

2) Think of a short, catchy title for your proposal.

3) Choose your supplies. They have many vendors that they work with. You are only able to choose supplies from their vendors at this time. They currently use 36 vendors, including my favorite Barnes and Noble, Nasco, Weekly Reader and Lakeshore Learning, just to name a few. The only tricky part of this step is that you have to fully check out twice. For example, if you choose items from Barnes and Noble, add all of the items that you want to your cart and check out just like you were going to purchase them yourself. (They will not ask for a credit card number.) Once you tell it to checkout, it will take you back to the DonorsChoose page. You will then have to check out on the DonorsChoose page. You have to check out there because you can use more than one vendor for each proposal.

4) Write your proposal. There is a step by step framework for writing your proposal. They tell you what to write in each section and then they put it together for you. (Do not forget to spell check.)

5) Give the specifics. They will ask several questions such as how many instructional hours your project will take, how many students will benefit from your project, if the project is considered “needed supplies” or “enrichment,” etc.

6) Submit your first proposal! Once your proposal is complete, it must be submitted for approval. One of the staff members will read your proposal and you will get an email when it is ready to be published.

7) Wait for a donor. Post the link on your blog or website. The proposal will be on the site for several months. If it is not funded in that time period, it will be removed from the site.

8) When your proposal is fully funded, you will start the thank you process.

My Celebrations:
I was a little skeptical about this at first. People just giving away money for whatever you want - but I have had six proposals fully funded to date. I have received over $1,500 of equipment and supplies for my classroom including 100 nonfiction books for my library, specimen viewers, TV microscope, measurement sets, window greenhouses, critical thinking math and science games, class set of clipboards, lifecycle activity tub and pocket charts and timeline pocket charts among many other things. If you have a DonorsChoose success story, please leave a comment and share!

Other Valuable Links:
Frequently asked questions: http://www.donorschoose.org/help/teacher_faq.html
How to Guide http://www.donorschoose.org/docs/HowToUseDonorsChoose.pdf
The Donors Choose Story http://www.donorschoose.org/about/history.html?zone=0


Written by: Melissa Ross

Friday, August 29, 2008

Geeks on Screen - Eric Blair


I don’t know how excited I am to be called a geek, but I guess geeks and gadgetry go hand-in-hand. Don’t worry, I’m not going to sing you a song about my love for technology like Kip on Napoleon Dynamite, but I will give you a little bit of background about why I think it’s so valuable.


Many people see technology as a thing in and of itself, a separate entity from the rest of their lives. What they fail to see is that technology is an aid. It is an enabler that gives you abilities you wouldn’t otherwise have. It’s like having an extra arm or something, but less gross. I didn’t just wake up one day and decide that I wanted to be a geek. It happened because I saw the possibilities that technology opened up for me, to take what I like to do to the next level. I’ve always liked to create, but doing things by hand could only take me so far. I mean, a drawing is just a drawing until you can do something with it. When you put that drawing into the computer, it could become anything. It could go on a brochure, or an animation, or even on a blog header, like this one. Whether it’s in joining an online community of people with similar interests who can share their knowledge, or chronicling your baby photos in a DVD slide show to share with the grandparents, no matter what you’re interested in, there’s some way that technology can enrich your experience.


Now while I would love to go on and on about my various technological passions, like graphic design and illustration, I was called onto this soapbox to share my video-making process. Like with all things, it starts as an idea. When the time came to start working on this year’s video, Susan told me that the theme was going to revolve around the 7 wonders of the world, highlighting Chets Creek Elementary as the 8th, and how we can utilize technology to travel the globe. Visually, it seemed really vague, and it was sort of my job to reel it in. In previous years, the visuals have been pretty cut and dry, with the western theme, the magic kingdom theme, the Hollywood red carpet theme, etc. But this one was tough to wrap my brain around. My first thought was a west coast or Polynesian surfing motif, having a tagline along the lines of “Cyber-surfing the globe.” Then I was thinking back to vintage deco travel posters (I love that stuff), but it just didn’t feel fun enough for an elementary school. After brainstorming and talking it over with some of my partners here, like magic, the Indiana Jones-styled adventure theme began to take shape.


Now that we had the general idea, it was time to start playing. I went online and looked at a lot of the Indiana Jones stuff to pull together visual cues to tie everything together. Things as simple as old parchment paper and a thematic font go a long way when used correctly. Then I took our mascot (thanks again Tom Sapp!) and dressed him for adventure.


Now the real fun starts: making Mrs. Phillips do all sorts of crazy stuff. My philosophy for these projects that I do for the school is If it makes me laugh, do it. Because if it’s not fun, then nobody will care, myself included, and I’ve just wasted my time. I knew right off the bat that I’d have her looking for some sort of ancient relic, so I started jotting down some general stories that she could follow, and I found that as I started writing it and working through it, it just started writing itself. So now I have a loose story, but I have to fill it with fun stuff, so I started writing everything down that came to mind. I looked at the different locations that she’d be going and what kinds of funny things she could do there. Like Egypt, for example: sliding down a pyramid, flying on a magic carpet, poking around a mummy’s tomb…There are just tons of fun things to do everywhere, and no ideas are too lousy to jot down.


Now that I knew what I was going to film, I needed to look at how I’d film it. Since the new theme is always such a big secret around the school, I couldn’t exactly have Mrs. Phillips go swinging around on her whip through the front foyer, golden idol in hand, so I had to green screen her into every piece of the film. Because of this, everything had to be pretty well-planned. In previous years I’ve just filmed Susan on the green screen in a bunch of different angles and slapped it together in editing, but I wanted this one to be a little more deliberate. So I started storyboarding. Reading the story that I’d written and what scenes I would need, I started drawing small thumbnails of how the scenes would play out visually.


Once I had all of this figured out, it was time to start filming. There’s just something satisfying about being able to put my boss in whatever absurd situation my kooky brain can cook up. It helps get me through all of the tedious hours spent editing the video. So as I mentioned before, the film had to be done on a green screen. What this means, for those who don’t know, is that I filmed Susan in front of, you guessed it, a green screen. The reason for this is that, with special software, I can remove all of the green from the film and layer her into whatever I want. Using this, I can do things like place her onto a teetering glacier in the middle of Antarctica, while all I filmed was her standing still in front of a green wall. Way cool! The day that I learned how to use the green screen, my mind was blown. If you embrace it, you can really do anything. You can play basketball with your head. You can make a black and white noir film. Anything! And without even leaving your living room.

With all that green screenery behind me now, the easy part comes. Since everything was planned out, now it’s just a matter of putting the pieces together, adding in scene transitions, sound effects, and music, in addition to whatever special effects it needed, like desaturating the film, giving it a sepia tone, and making it look aged.

Sorry I can’t offer you a step-by-step how-to guide to doing this, as every video editing program works a little differently, but the thought process is far more important than anything else anyway. For those curious though, the editing program that I use is called Pinnacle Studio. You can get it at electronics stores like Best Buy or Circuit City, and it runs around $100.

So after this long, drawn-out explanation of how I handled the conception of the year’s theme, what I really want you to walk away with is that technology is important, but it’s only a tool and shouldn’t be feared. Saying that you don’t like technology is like saying that you don’t like a hammer, or a can opener. It won’t do the work for you, you still need to have a good idea, and dream big, but it will help you actualize that idea in a big way.